YouTube is great.
So is Pinterest.
All these ideas…..SO MANY….
As I pulled out the boxes of Department 56 village pieces, I wondered if it was possible to construct a landscape for this hodgepodge collection accumulated over the years. I entered into a Google search:
CHRISTMAS VILLAGE LANDSCAPES
And….BOOM! The magic of the internet threw me into a kaleidoscope of possibilities. They really are endless.
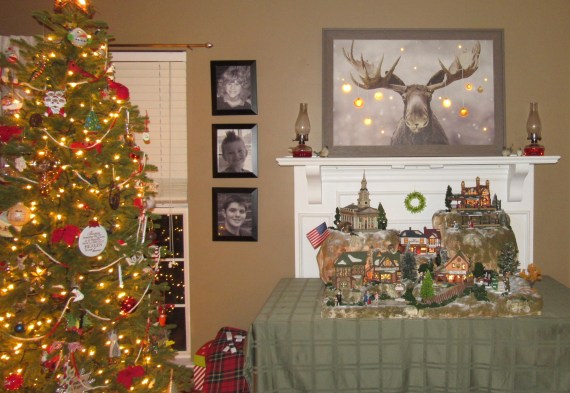
3 weeks and too many spent bucks later, I have a home for my Village People and their town, now lovingly called Moose Junction. You’ll understand when you see the final picture below.
This is how it started, after all the boxes of styrofoam and glues were harvested from internet and local walk-in stores. I cut the styrofoam using a hot wire cutter, and used foam glue and styrofoam pins to secure the pieces. This is how I “planned” my city, and made an electrical engineering plan.
Looks pretty good just like that, doesn’t it? I moved around the buildings until I got the look I wanted. Placing a few village people on the scene also helped me get my head around what I was going for. My entire landscape is made up of three sections. Hopefully this will help with storage. The back section is 12″ x 36″ x 2″ smooth foam. I learned this important thing right off the bat. There are different kinds of styrofoam. Who knew!? Turns out, the best foam to work with when creating junk like this is the smooth foam. I got my stash from Hobby Lobby and Woodland Scenics. The first foam I ordered from Hobby Lobby online was the large open cell foam. Thank goodness I could return it to the store and not have to wait on returning it via UPS. The front half of the village is made up of two pretty much equally split sections of 12″ x 36″ x 1″ smooth foam.
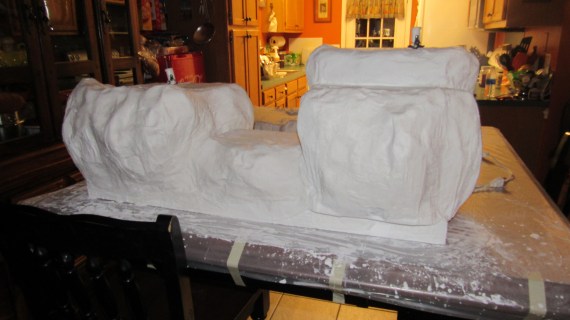
Next I had to add newspaper puffs to my structures. This gives the plaster cast something to adhere to. This is the back section, which will make up the higher “mountains”.

Full sheets of newspaper “pillowed” works best.
The next step was to add plaster casting. I used the cement sheets from Woodland Scenics. Some I purchased online from Hobby Lobby, and some I bought in person at Hobby Lobby. They had a better price on the concrete sheets. I found this step to be the most messy and enjoyable phase of construction. The structure is starting to take shape!
Isn’t that neat?! Here are the other two sections for the front, lower elevation:


I let these sections dry for about 3 days. Everything I watched and read said that the castings should be dry in 30 minutes or so, but even though I used two layers of sheets, as advised, the model was very damp feeling for a long time. It may have been that I didn’t let the sheets drip enough when removing them from the water basin to apply to the foam and newspaper structures.
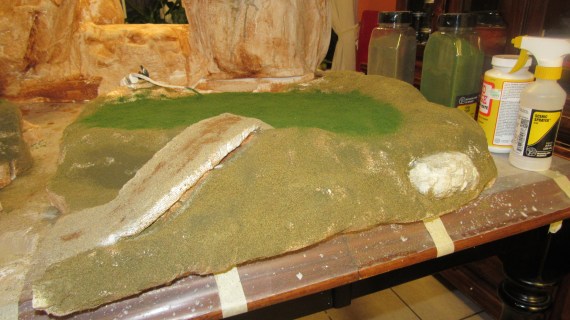
Then I added some rocks. These little guys are cool. I used a rock mold by Woodland Scenics and some of their mixture. The rocks set up in about 20 minutes. I used the same concrete sheets to adhere the rocks to various places on my mountain ledges. Then I stained the rocks using earth pigments from Woodland Scenics (yellow, gray & black).

Next was the prepping of the under turf. I couldn’t get my hands on a Woodland Scenics product called Under Earth, which is a pigment they sell, so I made my own pigment by diluting an acrylic antiquing medium. It worked pretty well. Basically you just want to apply color to the plaster so that it looks like earth underneath the grasses and sands and snows to be added. I applied with a sponge brush.

After all was browned and glorious, I began adding my turf. This is a pretty large landscape, and the fun and newness of using shakers filled with various colored “grasses” wore off quickly. What got me was the gluey parts. I did not buy enough Woodland Scenics Scenic Cement, which is sprayed under the turf and on top of every layers, to hold the ground in place. It was frustrating to have to run to the store or try to figure out an alternative adhesive. I was able to use Modge Podge quite successfully in-between trips to Hobby Lobby, but my tiredness of this task made for messy application. Before I build another landscape, I’ll research and find some alternatives to have on hand.
So I added darker turf first, dotted with lighter and “burned” turf, then sprinkled on snow.
Finally, after all turfed out and everything glued in place, THE FUN finally settled in. My husband said I hit “Summit Fever”, as I worked until I had the entire village set up and plugged in.
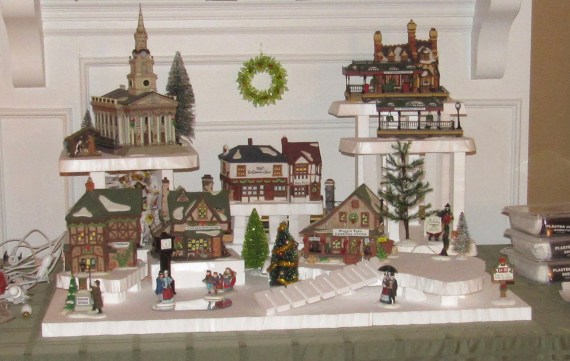
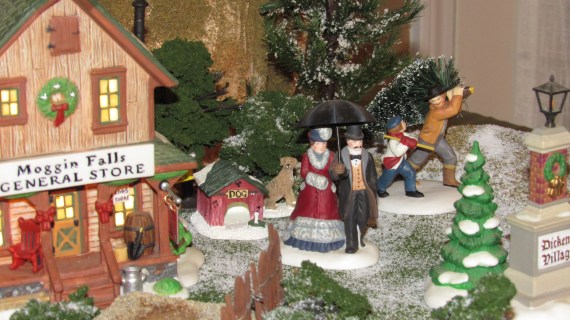
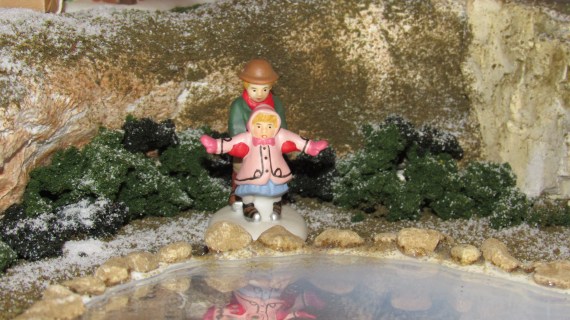
Here’s the final result:


Here’s a picture of it all glowy and happy in the dark:

And finally, here’s how it looks from afar. See why we call it Moose Junction?